How to Clean and Restore Vintage Diecast Cars Like a Pro

What You'll Learn About Restoring Vintage Diecast Cars
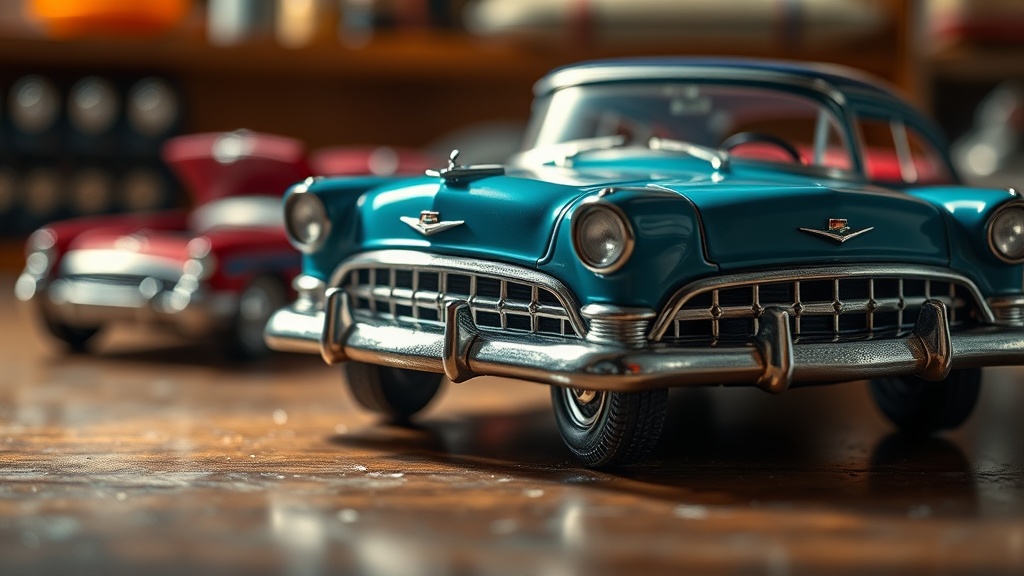
This guide covers the complete restoration workflow for vintage diecast vehicles—from initial assessment and proper disassembly to paint correction, chrome restoration, and reassembly techniques that preserve value. Whether you've inherited a box of childhood Matchbox cars or stumbled upon a dusty Hot Wheels Redline at a flea market, knowing how to clean and restore these miniature metal sculptures properly can mean the difference between a $5 garage sale find and a $200 collector's piece. The methods here apply to diecast models from the 1950s through the 1990s—the golden era of metal toy car manufacturing.
What Tools Do You Need to Restore Vintage Diecast Cars?
You'll need a specific set of tools—nothing exotic, but precision matters when working with forty-year-old pot metal and brittle plastic.
The Basics
Start with microfiber cloths (the kind without stitched edges that scratch), cotton swabs, soft-bristled toothbrushes, and a compressed air duster. A magnifying lamp helps enormously—you're working at 1:64 scale, and what looks clean to the naked eye often reveals grime under magnification.
For disassembly, invest in a precision screwdriver set. The Wiha 26790 set handles most diecast screws, though older Corgi and Dinky models sometimes use imperial threads. You'll also need plastic prying tools (cell phone repair kits work perfectly) to separate riveted bases without marring the metal.
Cleaning Supplies
- Dawn dish soap—cuts through decades of hand oils and dust
- Isopropyl alcohol (90%+) for removing old decals and adhesive residue
- White vinegar—gentle acid for corrosion on baseplates
- Flitz metal polish or Mothers Mag & Aluminum Polish for unpainted metal surfaces
- Toothpicks—wooden, for scraping paint from door seams and wheel wells
The catch? Never use acetone or brake cleaner on diecast. These solvents attack the zamak (zinc-aluminum alloy) that forms most vintage car bodies, causing metal fatigue and zinc pest—a white, powdery corrosion that's irreversible.
How Do You Safely Disassemble a Vintage Diecast Car?
Most vintage diecast vehicles come apart through one of three methods: screws, rivets, or a combination of both.
Post-1970 Hot Wheels and Matchbox typically use a single rivet through the base. To remove these, you'll need a drill with a small bit—3/32" works for most. Drill slowly, applying just enough pressure to remove the rivet head without drilling through the base itself. Some collectors use a Dremel with a grinding wheel, but that's risky for beginners. A handheld pin vise gives more control.
Here's the thing about reassembly—you'll need replacement rivets or you'll convert to screws. Tap Plastics sells nylon rivets in various sizes that work well, or you can tap the post and use small machine screws (2-56 or 0-80 thread, depending on the model).
Corgi Toys from the 1960s and 70s often used multiple screws hidden under decals or in wheel wells. Check carefully before applying heat or force—stripped screw posts are a nightmare to repair.
| Brand | Era | Fastener Type | Common Size |
|---|---|---|---|
| Hot Wheels | 1968-1977 (Redline) | Single rivet | 3/32" post |
| Matchbox Lesney | 1953-1969 | Rivet or tab | Varies by series |
| Corgi Toys | 1960s-1970s | Multiple screws | 2mm or 2-56 |
| Dinky Toys | Pre-1970 | Rivet or base crimp | Imperial threads |
| Johnny Lightning | 1990s+ | Screw base | Phillips head |
What's the Best Way to Clean Diecast Without Damaging Paint?
Original paint—called "original finish" in collector circles—adds significant value. The goal is preserving it while removing dirt, oxidation, and the sticky film that develops as paint binders break down over decades.
Begin with warm water and Dawn dish soap. Submerge the body (with windows removed if possible) for ten minutes. Use a soft toothbrush in circular motions, following the body lines. Don't scrub across seams—that's where paint lifts first.
For stubborn grime, create a paste from baking soda and water. Apply with a cotton swab, let sit for two minutes, then rinse. This mild abrasive lifts oxidation without cutting through clear coat. Worth noting: never use Magic Erasers on diecast. They're essentially fine sandpaper and will leave micro-scratches that show under light.
Chrome presents special challenges. Vintage chrome plating was thin—often just microns thick—and it flakes easily. For tarnished chrome wheels or bumpers, Simichrome Polish works well (ironically, it's designed for real car trim). Apply sparingly with a soft cloth, buff immediately. If chrome is completely gone, you'll need to decide between accepting the patina or sending parts to a rechroming service like Metal Mayhem Racing—though for common models, replacement parts from Redline Shop often cost less than professional replating.
Dealing with Zinc Pest
Zinc pest (also called zinc rot) appears as white powdery spots or bubbling paint. It's caused by impurities in the zamak alloy reacting with moisture over time. Here's the hard truth: you can't reverse it. You can only stabilize it.
Remove all loose material with a brass brush. Apply a rust converter—yes, on zinc—like naval jelly to neutralize oxidation. Prime immediately with self-etching primer, then paint. The repair won't be invisible, but it'll stop further decay.
Can You Restore Diecast Windows and Interiors?
Clear plastic windows yellow and craze (develop micro-cracks) over time. There's no magic cure, but you can improve appearance significantly.
For yellowing, Retrobright—a hydrogen peroxide gel originally developed for vintage computers—works on diecast windows too. Apply the gel, wrap in plastic wrap, and leave in sunlight for 4-6 hours. The UV catalyzes the peroxide, lifting yellowing without abrasion. Results vary based on plastic formulation—1960s Matchbox windows respond better than 1970s Hot Wheels.
Missing windows require replacement. Evergreen Scale Models sells clear styrene sheets in various thicknesses. Trace the original window, cut slightly oversized, then sand to fit using progressively finer grits (400, 600, 800, 1200). Polish with plastic polish like Meguiar's PlastX.
Interiors are easier. Most are simple plastic tubs in red, black, or white. Clean with soapy water and a toothbrush. For faded colors, Model Master or Tamiya acrylic paints match vintage hues well. Don't use nail polish—it's too thick and never fully cures.
How Should You Store Restored Diecast Cars?
Restoration means nothing without proper storage. Temperature fluctuations, humidity, and light exposure will undo your work within months.
Store cars in plastic cases—the "clamshell" style designed for sports cards work for 1:64 scale. For larger models, Acrylic display cases from Amazon or hobby shops prevent dust while allowing visibility. Avoid direct sunlight; UV degrades paint and plastic even through windows.
For valuable pieces (original Hot Wheels Redlines in excellent condition, early Corgi gift sets), consider Diecast Registry or similar archival storage. These use acid-free materials and controlled humidity.
That said, don't overthink it for common models. A plastic bin in a climate-controlled room works fine. The enemy isn't cardboard—it's moisture, heat, and handling. Every time you pick up a diecast car, you risk micro-scratches from dust particles. If you must handle them, grip the base, never the body. Oils from fingers accelerate paint deterioration.
Restoring vintage diecast cars connects you to manufacturing history—the Lesney factory in London pumping out Matchbox models in 1953, the El Segundo Hot Wheels plant in 1968 revolutionizing what a toy car could be. Each model represents a specific moment in metalworking, in automotive design, in childhoods across generations. Treat them with the respect those memories deserve. Start with one car. Document your process. Join communities like Diecast Exchange where collectors share techniques specific to particular models. The learning curve exists—but so does the satisfaction of rescuing a forty-year-old Red Baron or Custom Camaro from the junk drawer and returning it to display-worthy condition.
Steps
- 1
Gather Your Cleaning Supplies and Inspect the Car
- 2
Remove Loose Dirt with Soft Brushes and Compressed Air
- 3
Clean with Mild Soap Solution and Dry Thoroughly