Rescuing Lost Paint: Restoring Oxidation and Scratches on Vintage Diecast Models

Have you ever pulled a vintage 1:18 scale model from your display case only to find the once-vibrant luster replaced by a dull, chalky oxidation or a web of micro-scratches that obscures the fine lines of the casting? This degradation is often more than just surface dust; it is a chemical and mechanical reality of aging materials. Whether it is the breakdown of a lacquer finish on a 1960s Matchbox or the oxidation of a zinc-alloy body, understanding the metallurgy and chemistry behind the paint is the first step toward a successful restoration.
Understanding the Enemy: Oxidation vs. Surface Abrasion
Before applying any solvent or abrasive, you must diagnose the specific type of surface failure occurring on your model. In the world of diecast, we primarily deal with two distinct issues: oxidation and mechanical abrasion. These require fundamentally different approaches to correct without destroying the integrity of the original casting.
The Chemistry of Oxidation
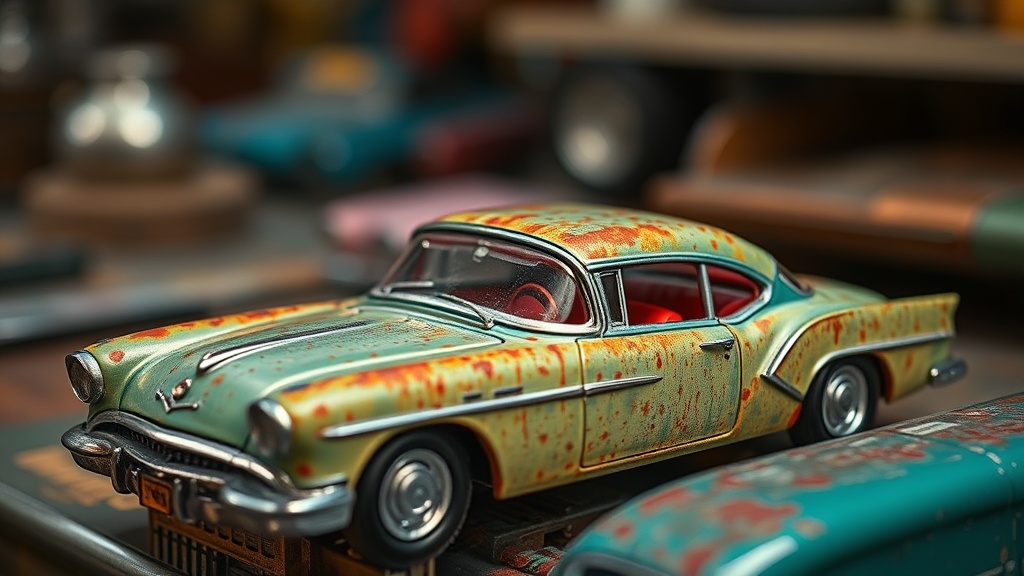
Oxidation occurs when the protective clear coat or the pigment layer itself reacts with oxygen and moisture in the air. This is common in models stored in humid environments or near coastal areas. You will recognize this by a "cloudy" or "milky" appearance that looks as though the car is covered in a thin layer of frost. In many cases, particularly with older zinc-alloy (Zamac) bodies, this is a sign of "zinc rot" or "white rust," where the metal itself is reacting. If the oxidation is purely on the paint surface, it can often be polished out. If the metal is oxidizing beneath the paint, the model may be structurally compromised.
The Mechanics of Scratches
Scratches are physical gouges in the paint or clear coat caused by improper handling, storage friction, or even aggressive dusting with a dry cloth. These can range from "swirl marks"—extremely fine scratches visible only under direct light—to deep gouges that expose the base metal. A swirl mark is a surface-level defect in the clear coat, whereas a deep scratch is a structural failure of the paint film. Identifying this distinction prevents you from over-polishing a surface that simply needs a touch-up rather than a full resurfacing.
The Essential Toolkit for Surface Restoration
Precision is the hallmark of a successful restoration. You cannot rely on household cleaners or generic automotive polishes, as many contain harsh chemicals that can melt the thin paint layers used in diecast manufacturing. Assemble the following specialized tools before beginning any work:
- Microfiber Cloths: Use only high-quality, lint-free cloths (such as those from the The Rag Company) to prevent adding new micro-scratches during the process.
- Polishing Compounds: A hierarchy of abrasives is required. Start with a fine liquid polish like Meguiar's Ultimate Compound for heavier marks, and progress to a finishing polish like Simichrome for high-luster metal or fine paint.
- Isopropyl Alcohol (70%): For cleaning the surface of oils and residues before polishing.
- Precision Cotton Swabs: For targeted application in recessed panel lines or around door handles.
- Modeling Clay: Specifically, a non-abrasive automotive clay bar to remove embedded contaminants.
Step-by-Step Guide to Removing Surface Oxidation
If your model suffers from light oxidation or a dull finish, the goal is to chemically "brighten" the surface without removing too much of the original paint. Follow this protocol to ensure a controlled recovery.
- Decontamination: Begin by washing the model with a pH-neutral soap and lukewarm water. Use a soft-bristle brush to ensure all dust is removed. Dry the model completely with a microfiber towel.
- The Clay Bar Method: If the surface feels gritty, use a piece of automotive detailing clay. Dampen a small section of the model with a lubricant (like a specialized clay lube or distilled water) and glide the clay over the surface. This removes embedded particles that a simple wash cannot reach.
- Applying the Compound: Apply a pea-sized amount of a fine-grit polishing compound to a clean microfiber cloth. Work in small, circular motions on a single panel at a time. Do not apply heavy pressure; the goal is to use the chemical properties of the compound, not brute force.
- Buffing to Clarity: Once the oxidation is lifted, use a second, clean section of the cloth to buff the area. You should see a gradual return of the gloss. If the paint appears to be "softening" or becoming tacky, stop immediately—you are applying too much pressure or the compound is too aggressive for that specific paint type.
Repairing Scratches and Paint Chips
When a scratch has bypassed the clear coat and entered the pigment layer, or if a chip has exposed the metal, simple polishing will not suffice. Polishing a deep scratch only makes the surrounding area shinier, which actually makes the scratch more visible due to the contrast. For these instances, you must perform a "fill and level" operation.
Leveling the Surface
For micro-scratches that haven't hit the metal, use a high-end automotive finishing polish. If the scratch is slightly deeper, you may need to use a specialized modeling paint to fill the void. For a 1:18 scale model, a standard hobby paint like Tamiya Acrylic is an excellent choice due to its fine pigment grain. Use a single-hair brush to fill the scratch, ensuring you do not get paint in the panel lines or the door gaps.
The "Touch-Up" Technique
If you are dealing with a paint chip on a corner or a fender, the "wet-on-wet" method is often too messy. Instead, apply the paint in extremely thin layers.
- Apply a tiny amount of paint to the chip.
- Wait at least 24 hours for the paint to cure fully.
- Once dry, use a Tamiya Finishing Polish or a very fine wet-sanding sponge (3000 or 5000 grit) to level the new paint with the surrounding surface.
- This ensures the repair is flush and does not create a "bump" that catches the light.
Advanced Maintenance: Protecting Your Work
Once you have successfully restored the luster of your diecast, you must protect the surface from future degradation. A restored model is more vulnerable than a factory-fresh one because the original protective layers have been thinned.
I highly recommend applying a high-quality carnauba wax or a specialized synthetic sealant. For diecast collectors, a liquid carnauba wax applied with a cotton swab offers a deep, warm glow that is perfect for display models. This creates a sacrificial barrier against oxygen and moisture. If you display your models in a glass case, ensure the environment is climate-controlled. Fluctuations in temperature and humidity are the primary drivers of both oxidation and the eventual failure of the paint bond.
If you are concerned about how your display environment affects the longevity of your collection, you may want to review our guide on adjusting your diecast display lighting to ensure UV exposure isn't contributing to your paint issues.
"In the realm of precision modeling, the difference between a relic and a masterpiece is the level of care taken during the maintenance phase. Treat the paint not as a coating, but as a structural component of the model's history."
Common Pitfalls to Avoid
During my years of observing material failures, I have seen many collectors inadvertently ruin their most prized pieces through well-intentioned but misguided cleaning. Avoid these three common mistakes:
- Using Isopropyl Alcohol on Aged Lacquers: While alcohol is great for cleaning, it can act as a solvent on certain vintage lacquer finishes, causing the paint to become cloudy or even dissolve. Always test a small, inconspicuous area (like the underside of the chassis) first.
- Over-Polishing: It is easy to get carried away trying to achieve a mirror finish. Remember that every time you polish, you are removing a microscopic layer of paint. Excessive polishing can lead to "thinning," where the paint becomes translucent, revealing the metal underneath.
- Using Abrasive Kitchen Sponges: Never, under any circumstances, use a green scouring pad or a kitchen sponge on a diecast model. The grit in these items is far too aggressive and will leave permanent, deep scratches that no amount of polishing can fix.
Restoration is a test of patience and technical precision. Approach each model with the understanding that you are working with a delicate piece of engineering history. By following these methodical steps, you can move beyond mere collecting and into the realm of true curation, preserving the aesthetic integrity of your diecast archives for decades to come.