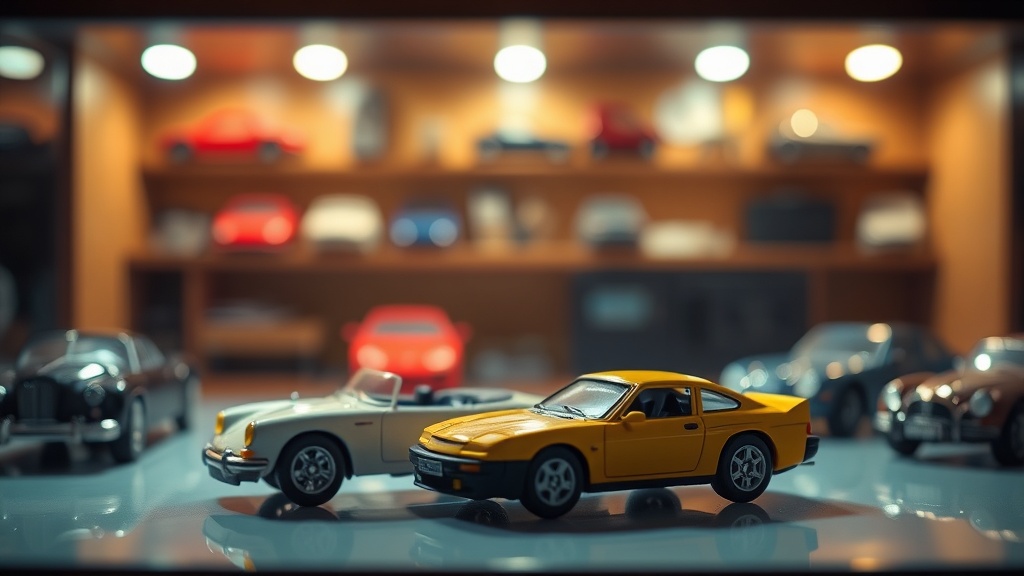
Choosing the Right Lighting for Your Diecast Display

Have you ever looked at a high-end 1:18 scale model in a showroom, only to find that once you bring it home, it looks flat, dull, or somehow "off"? The difference is rarely the quality of the casting itself, but rather the quality and placement of the light hitting the surface. Lighting is a critical component of preservation and presentation; it can either highlight the precision of a door shut-line or cause a distracting glare on a high-gloss paint job. This guide examines the technical requirements for lighting a diecast collection, focusing on color temperature, light sources, and the prevention of long-term material degradation.
Understanding Color Temperature and CRI
When selecting a light source, the first technical specification you must evaluate is the Correlated Color Temperature (CCT), measured in Kelvin (K). This determines whether your light appears "warm" (yellowish) or "cool" (bluish). For diecast collectors, this choice affects how much the actual paint color is perceived.
A warm temperature, around 2700K to 3000K, is often used in residential living rooms to create a cozy atmosphere. However, for a diecast display, this can distort the true hue of a vehicle. A "Nardo Grey" or a "Millennium Jade" may end up looking muddy or yellowish under warm light. Conversely, a very high Kelvin light, such as 6000K, can make a car look clinical and overly blue, stripping away the depth of the metallic flakes in the paint. For a professional-grade display, aim for a neutral white light between 4000K and 5000K. This mimics daylight and provides the most accurate representation of the model's factory paint color.
Equally important is the Color Rendering Index (CRI). CRI is a scale from 0 to 100 that measures how accurately a light source reveals the true colors of an object. Many cheap LED strips found on mass-market retail sites have a CRI below 80. This results in "color shifting," where the reds look dull and the blues look washed out. To showcase the intricate detailing of a high-end manufacturer like Autoart or CMC, you should seek out light sources with a CRI of 90 or higher. High CRI ensures that the subtle gradients in a pearl finish or the precision of a dashboard's color are visible to the naked eye.
The Risks of Heat and UV Radiation
Lighting is not just about aesthetics; it is a matter of structural preservation. As a collector, you must be aware that light carries energy in the form of heat and ultraviolet (UV) radiation. If you are not careful, your display setup can actively damage your collection through two primary methods: thermal expansion and photochemical degradation.
Thermal Stress and Material Expansion
Incandescent bulbs and even some older halogen spotlights generate significant heat. When these are placed too close to a diecast model, they create localized "hot spots." This heat causes different materials within the model to expand at different rates. A diecast car is a composite of a zinc alloy (Zamac) body, plastic interior components, and rubber tires. If the body heats up while the plastic chassis remains cool, you risk warping the tolerances of the model. This can lead to permanent issues such as misaligned doors or hood gaps. Furthermore, excessive heat can soften the adhesives used in high-end resin models or cause the "sticky plastic" syndrome often seen in aging vintage toys.
UV Degradation and Paint Fading
UV radiation is the primary enemy of pigment. Just as sunlight fades a real car's paint, UV light can cause "photo-oxidation" in diecast models. This leads to the fading of bright colors and the yellowing of clear plastic parts, such as headlights or windshields. If your display is near a window, you must use UV-filtering glass or acrylic. Even with indoor lighting, ensure you are using LED technology. Unlike fluorescent tubes or incandescent bulbs, high-quality LEDs emit negligible amounts of UV radiation, making them the safest choice for long-term display. This is a vital part of properly storing and displaying your diecast car collection to ensure longevity.
Selecting the Right Light Source Type
The type of hardware you choose will dictate the "mood" and the level of detail visible in your display. There is no one-size-fits-all solution, as a single-car pedestal requires different lighting than a multi-tier wall shelf.
- LED Strips (COB vs. SMD): For shelf lighting, Surface Mounted Device (SMD) LEDs are common, but they often show "dots" of light that can create distracting reflections on a car's hood. For a more professional look, use Chip on Board (COB) LED strips. COB LEDs provide a continuous, seamless line of light, which creates a much smoother gradient across the model's surfaces.
- Spotlights: If you are displaying a single "hero" piece, a small LED spotlight is ideal. This creates high-contrast shadows and emphasizes the sculptural lines of the car. However, be wary of the "glare" effect. A single point of light can create a harsh white reflection on a highly polished diecast surface, obscuring the detail beneath it.
- Edge-Lit Acrylic: This is a common technique for high-end trophy-style displays. The light travels through the edge of the acrylic and illuminates the model from below. This is excellent for highlighting the undercarriage and the stance of the vehicle, but it can often wash out the top-side details if not balanced correctly.
Placement Techniques for Maximum Detail
Once you have selected your hardware, the placement of the light determines whether you are seeing the engineering or just a silhouette. In the automotive world, light is used to define shape. You should apply these same principles to your display.
The Three-Point Lighting Approach
In professional photography, three-point lighting is the standard. You can adapt this for a diecast display by using a primary light source (Key Light), a secondary light source to fill in shadows (Fill Light), and a third light to highlight the edges (Back Light or Rim Light).
- The Key Light: This is your strongest light, placed at a 45-degree angle to the front of the car. It provides the primary illumination for the side and front of the vehicle.
- The Fill Light: This is a much softer light placed on the opposite side. Its job is to "fill" the deep shadows created by the Key Light. This ensures that the details in the wheel wells and the interior are not lost in total darkness.
- The Rim Light: Positioned behind or to the side of the model, the Rim Light catches the edges of the car's silhouette. This is crucial for separating the car from a dark background and highlighting the curvature of the fenders and the roofline.
Avoiding Direct Reflection
A common mistake is pointing a light source directly at the most reflective parts of the car, such as the windshield or the chrome bumpers. This creates "specular highlights"—bright, blinding spots of light that draw the eye away from the model itself. To avoid this, use diffusers. A diffuser can be a simple piece of frosted acrylic or even a thin piece of white fabric placed between the light and the model. This scatters the light rays, turning a harsh point of light into a soft, wrapping glow that emphasizes the car's contours without the distracting glare.
Maintenance and Monitoring
Lighting maintenance is an ongoing process. Over time, even the best LED setups can degrade or accumulate dust. Dust on a light source can change the color temperature or create uneven light distribution. As part of a regular maintenance routine, use anti-static brushes to clean your display cases and light housings. This ensures that the light remains clean and that you aren't inadvertently introducing static electricity or abrasive particles near your models during cleaning.
Finally, monitor your collection for any signs of light-induced damage. Periodically check your models for any "clouding" of the clear parts or a loss of luster in the paint. If you notice these changes, it is a sign that your light intensity is too high or that your light source is emitting more UV/heat than previously thought. Adjusting your setup now will prevent the permanent loss of value and aesthetic appeal in your collection.